
Processing Patient Payments in Kareo
In our last blog post, we discussed how to set up the card processing feature in Kareo with a Stripe account. (Read our tutorial here.) In this blog post, we’ll discuss how to accept and process patient payments in Kareo, from both the clinical and the practice management sides!
The Clinical Side Tutorial:
- Log into Kareo.
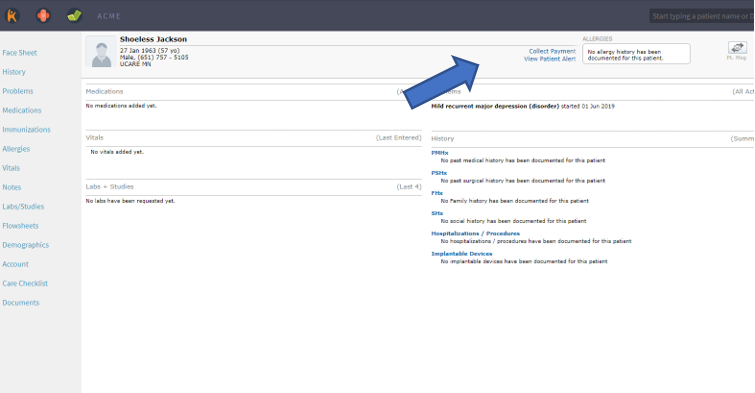
- Search for the patient whose credit card you want to process, and go to their face sheet.
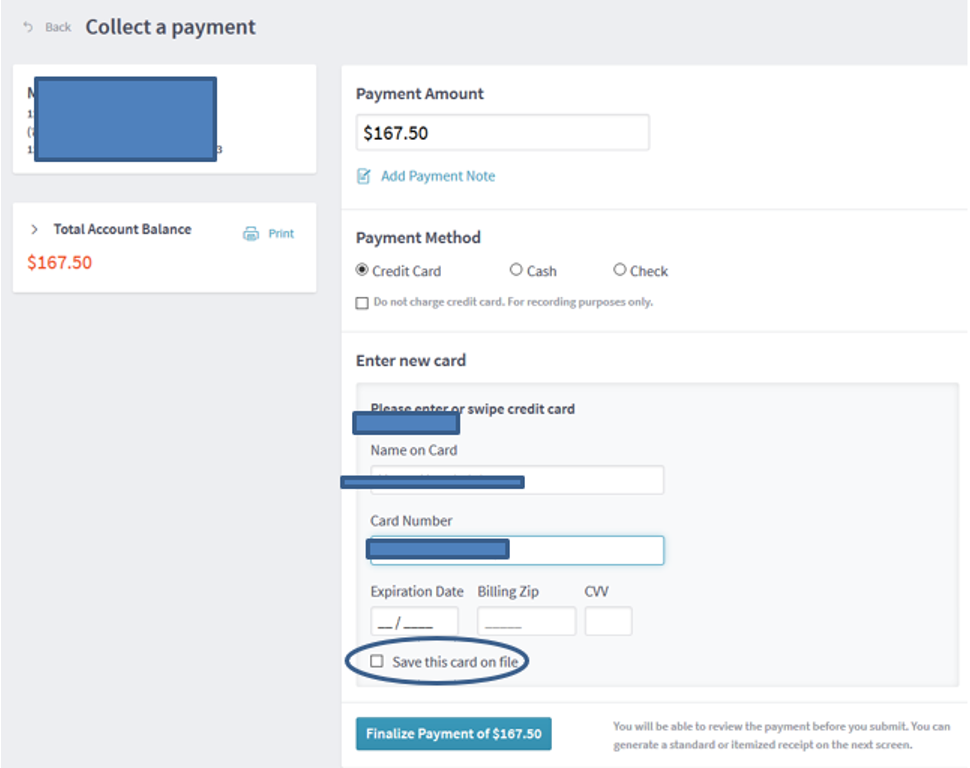
- From within the patient’s record, click on “Collect Payment” (click on the image below to enlarge).

- Fill in the fields as appropriate.
- Best Practice: Your biller will appreciate some detail information about the payment. Click on the “Add Payment Note” in blue, and include comments about what the intent is of the payment (e.g., “on account” or “today’s copay”).
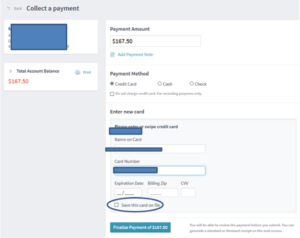
- Note the check box, “Save This Card on File” (circled above). Checking this box makes future payments extremely easy! However, be sure to have a signed authorization from the patient on file. Best practice: obtain this authorization form early on with your patient, before you enter payments from them.
- When you click on the “Finalize Payment” button, if the payment amount is the patient’s full balance due, a list of the encounters being paid will be displayed.
- A handy feature here is the check box of “Create Itemized Receipt” which your patients who need reimbursement from health savings accounts or other sources may need for their records.
- Click on “Finalize Payment” and you’re done!
Here is a step-by-step on how to accept and process credit card payments on the Practice Management side.
The Practice Management Side:
- Log into the patient’s record from within the Practice Management side of Kareo.
- From within the patient’s record, click on “Collect Patient Payment” in the Practice Management.
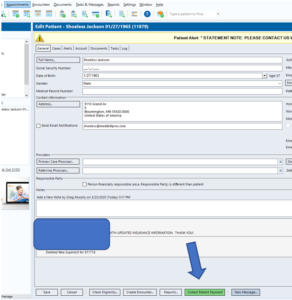

3. From there, the process is the same as the Clinical side process detailed above (steps 4-8).
9. Click on “Submit Payment”. Done!
Best practice: get the patient’s permission via an assigned form to keep their credit card information on file so next time, all you need to enter is the amount of the bill. To keep their credit card information on file, hit the “Save this Card on File” button. However, as we discussed above, be sure that you are authorized to keep the patient’s card information on file.
NB: Regardless of which side you enter the payment on, the payment will automatically appear as an unapplied payment on the Practice Management side. You don’t have to write anything else down – no logging and faxing of payments received, which you and your biller will love!
A system like MediBill’s makes it easy to print out a receipt of the payment made. You can create an itemized receipt so that transactions show up clearly and quickly. Your business transactions suddenly become easier, faster, and less paperwork for you and your patient. Who doesn’t love that?